You have no items in your cart
Shop our collectionsFree Shipping On Orders $90+
Free Returns
30-Day Trial

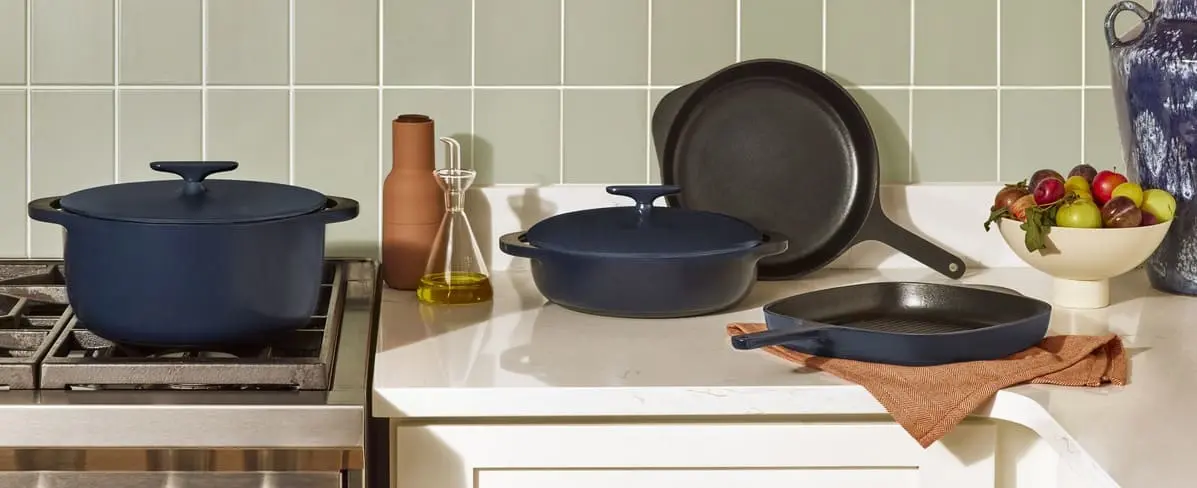
Use on low to medium heat only
Stovetop Agnostic
550°F Max Oven Heat
Handwash Only

1
Hand wash your pans with warm, soapy water to remove any dirt or debris left over from the manufacturing and shipping process.
2
Wipe dry with a soft, non-abrasive dish towel to avoid scratching. The bottom surface of your pan should be dry before touching a burner.
3
Ceramic comes naturally non-stick, so no need to season your pan beyond a dash of oil.
4
Pre-heat for up to 90 seconds on low to medium heat only before adding oil. Avoid leaving an empty pan on a hot burner, unless over very low heat.
1
Ceramic can hold heat more efficiently than traditional pans, so use pans on low to medium heat when cooking. Overheating can wear away the non-stick coating.
2
Your food will effortlessly glide on your ceramic pans, so less is more when it comes to oil or butter. 1-2 tablespoons is more than enough to lightly coat the entire pan surface. Allow 20-30 seconds to pre-heat before you add food.
3
Avoid using oil sprays or cooking aerosols for greasing pans to preserve the naturally slick coating.
4
Metal utensils with rough edges may damage your non-stick coating. Stick to wooden, silicone, plastic, or nylon products. Always be sure to cut or dice food on a separate surface and not inside your pan.
5
Carefully place pans on and off stovetops. Sliding across metal stovetops may damage the steel base.
1
Let your cookware cool completely before running cold water over its surface to avoid thermal shock (meaning it might crack—yikes!). Your pans can withstand extreme temperatures on both ends of the spectrum, but sudden and significant changes can reduce their lifespan.
2
Our non-stick coating makes cleaning a breeze. Save time & water with a gentle scrub to keep your pans in optimal condition.
3
Clean the cooking surface with warm, soapy water and a non-abrasive sponge or dishcloth until the pan is spotless before storing. For stains on the exterior of the pan, you may use a stronger sponge (we suggest a wool sponge) with a high-strength detergent.
4
If food gets stuck onto the surface, fear not! Simmer soapy water over a low heat then gently scrape away with a sponge or non-abrasive scrubber. Rinse and repeat if needed.
Yes, it does—check out our warranty here !
To cook all of your favorite recipes while keeping your Caraway Cookware in mint condition, we recommend low to medium-low temperatures. Due to our thick, heat absorbent design, the cookware will hold onto whichever setting you use. A heat setting that is too high can badly burn your food and nullify the non-stick.
Our unique Canvas Lid Holder and Magnetic Pan Racks are perfectly packed inside the box of our Cookware Set and are not available for individual purchase. Check out the Cookware Sets here to take advantage of our space-saving storage solutions.
Caraway Cookware’s non-stick performance is best complemented with a little bit of oil, butter, or ghee to keep things slick and smooth while cooking. Note that a small amount will go a long way, and will ultimately help keep food from sticking to cooking surfaces and retaining your pan’s non-stick.
Stovetop Agnostic
Non-Toxic Stainless Steel
5-Ply Construction

1
Hand wash your pans with warm, soapy water to remove any dirt or debris left over from the manufacturing and shipping process.
2
Wipe dry with a soft, non-abrasive dish towel to avoid scratching and dry spots. The bottom surface of your pan should be dry before touching a burner.
3
Add oil or butter to your pan to create a slick surface for your food. Bring ingredients to room temperature before placing them into your heated pan (too cold food tends to stick to a warm pan!).
4
Preheat on low to medium heat before adding oil. Avoid leaving an empty pan on a hot burner.
5
For your first few uses, monitor your heat setting to gauge your stovetop & oven’s heat efficiency and adjust recipes as needed. Food should sizzle when it hits the pan as an indication of proper heating.
1
Caraway's 5-ply stainless steel cookware can hold heat more efficiently than traditional pans, so use yours on low to medium heat when cooking. Overheating can cause food to stick to the pan!
2
Add oil or butter into your pan to lightly coat the entire surface. Allow time to pre-heat before you add food.
3
Avoid oil sprays or cooking aerosols. Instead, use butter or liquid based oils to best preserve your cookware.
4
Wait until the food inside your pan is nice & hot before adding salt to prevent calcium deposits from forming “pit” marks on the surface of your cookware.
5
Utensils with rough edges (like metal knives, whisks, or spatulas) will damage your stainless steel pans, so stick to soft wooden, silicone, plastic, or nylon products.
6
Carefully place pans on and off stovetops. Sliding across metal stovetops scratch the pan’s exterior.
1
Let your cookware cool completely before running cold water over its surface to avoid thermal shock (meaning it might crack—yikes!).
2
Save time & water with a gentle scrub to keep your pans in optimal condition. Avoid using the dishwasher as it can affect the longevity of your cookware.
3
Clean the cooking surface with warm, soapy water and a non-abrasive sponge or dishcloth until the pan is spotless before storing. For tougher stains, you may use a stronger sponge with a high-strength detergent.
Nope! Stainless steel doesn’t need to be seasoned like cast-iron or carbon steel. However, following proper heating instructions will go a long way in maximizing cooking performance.
Exposure to prolonged periods of heat may cause discoloration over time, but fear not! Any stainless steel cookware cleaner will have your pans looking as good as new.
We recommend using our FSC-certified wood utensils (or similar) to keep the cooking surface as scratch-free (and high performing) as possible!
You bet! All pans have a magnetized stainless steel base plate that can be used with induction stovetops. Additionally, all pans are oven safe up to 550ºF and used under the broiler.
Stovetop Agnostic
500°F Max Oven Heat
Handwash Only
1
Hand wash with warm, soapy water to remove any dirt or debris left over from the manufacturing and shipping process. Wipe dry with a soft, non abrasive dish towel.
2
The enamel coating protects the surface of the pan without needing to season it before use or over time.
3
Your pan can handle high temperatures up to 500° F, but low to medium is ideal for the majority of your cooking needs. Do not heat an empty pan for extended periods of time to avoid damaging the enamel surface.
4
The enameled surface is very durable, but it can chip or crack if struck against a hard surface.
1
Preheat pan on medium-high heat and then lower to low-medium when cooking for a more seamless cooking experience with less sticking and even cooking. Avoid preheating for more than 5 minutes before adding ingredients into your pan.
2
Add oil or butter to the pan and heat until shimmering, but not smoking. A light coating is all you need.
3
Once preheated with oil or butter, add your ingredients. It's recommended that all ingredients are brought to room temperature before adding to the pan for optimal performance, quicker cooking times, and a more even finish.
4
Ingredients, especially proteins, will naturally release from the cooking surface when a proper sear has been formed. Flipping too early may cause sticking and lead to more cleanup later.
5
Cast iron retains heat exceptionally well, so heat settings may need to be lowered while cooking to avoid overcooking your meal.
6
Remove stuck on remnants at the bottom of your pan by deglazing it with the liquid of your choice, like wine or stock. With this, make a delicious sauce while minimizing the cleanup.
1
Let your pan return to room temperature before running cold water over it. This will avoid damaging the enamel coating.
2
Hand wash with warm water, dish soap, and a non-abrasive sponge or dish towel until spotless. Avoid using the dishwasher as it will affect the longevity of your pans. Never use metal scrubbing pads or harsh chemicals, as this could damage the pan.
3
If food is stuck onto the surface, simmer soapy water over low heat. Then, gently scrape away with a sponge or non-abrasive scrubber or bristle brush. Rinse and repeat if needed.
4
Browning is natural with regular use and adds character. For stains or to restore shine, use a stronger sponge and a high-strength detergent, baking soda and vinegar, or regular dish soap.
Nope! Our Enameled Cast Iron comes ready to use right out of the box—no extra steps required. It’s designed for easy upkeep too: just wash with warm, soapy water and you’re good to go.
It’s not non-stick. However, it features a smooth, durable coating which helps reduce sticking compared to traditional cast iron pans. Simply preheat your pan and add oil or butter for a seamless cooking experience.
You bet! Our Enameled Cast Iron works on all stovetops, including induction, and is oven-safe up to 500°F. It’s also broiler-safe up to 450°F, giving you even more flexibility in the kitchen.

FREE OF PTFE, PFOA, LEAD & CADMIUM
550°F Max Oven Heat
Handwash Only
1
Hand wash your bakeware with warm, soapy water to remove any dirt or debris left over from the manufacturing and shipping process.
2
Wipe dry with a soft, non-abrasive dish towel to avoid scratching. The full top and bottom surface of your bakeware should be fully dry before being put in the oven.
3
Ceramic comes naturally non-stick, so no need to season your bakeware.
4
Heat your oven to your desired temperature before adding in your bakeware. Avoid putting empty bakeware into the oven without any food on it.
5
Your bakeware does not play well with open flames (stovetops, grills, campfires), so stick to only using in the oven.
1
Our bakeware’s ceramic coating allows for even heat distribution. For your first few uses, closely monitor your heat setting to dial in on the perfect baking temperature or oven time and adjust recipes as needed.
2
Our ceramic surface is designed for easy release when fully coated with flour, or a light amount of oil or butter, before food is added, per recipe instructions. For a speedy clean up, lining with parchment paper will also maintain its non-stick quality.
3
Avoid oil sprays or cooking aerosols. Instead, use butter or liquid based oils to best preserve the slick coating.
4
Utensils with rough edges will damage your non-stick coating, so stick to soft wooden, silicone, plastic, or nylon products. Avoid using metal entirely. Do not cut baked goods while they are in the pan.
5
Sharp metal edges may damage the exterior base coating, so place carefully on and off oven grates and stovetops.
6
When placing your bakeware in or out of the oven, use a pot holder, oven mitt, or dishtowel as the pans and handles will get hot to the touch.
7
It is normal for bakeware to slightly “warp” and make a popping sound in the oven due to the heat. Don’t worry—our bakeware’s reinforced rim will ensure it will flatten once cooled.
8
Not to be used under an oven’s broil setting, beyond 550°F, or in a microwave.
9
When you remove your bakeware from the oven, place your pans on the cork trivets provided to protect your kitchen countertops.
1
Let your bakeware cool completely before running cold water over its surface to avoid thermal shock (meaning it might crack—yikes!). Your bakeware can withstand extreme temperatures on both ends of the spectrum, but sudden and significant changes can reduce their lifespan.
2
Our non-stick coating makes cleaning up by hand a breeze. Save time & water with a gentle scrub to keep your bakeware in optimal condition.
3
Clean the cooking surface with warm, soapy water and a non-abrasive sponge or dishcloth until the pan is spotless before storing. For stains on the exterior of the pan, you may use a stronger sponge (we suggest a wool sponge) with a high-strength detergent.
4
If food gets stuck onto the surface, fear not! Cover the baking pan with 2 tablespoons of baking soda and 1 cup vinegar. Let the mixture sit for 30 minutes. This will release stuck-on food so that it can be easily wiped away. Once the mess is gone, wash the baking pan with mild dish soap.
5
Similar to your favorite cast iron pan, browning is natural and bound to occur with regular baking and use (it builds character)—but it’s nothing some baking soda and vinegar can’t remove.
6
Dry with a soft, non-abrasive dish towel or place inside your bakeware storage to air dry completely.
7
For storing, we recommend utilizing your storage caddies to keep your bakeware in top condition. If stacking, place towels, trivets, or a protective sheath between pan surfaces to minimize direct contact.
Yes, it does—check out our warranty here !
Caraway Bakeware can easily handle roasting temperatures up to 550ºF. The Bakeware can also withstand freezing temperatures, though we do not recommend going directly from a hot oven to a cold freezer until the pans cool down. We do not recommend using Caraway Bakeware under an oven’s broil setting.
We recommend following the recipe and lining the bakeware if needed. Anything that covers the baking surface during use will also extend the pan’s longevity.
Cover your pan with 2 tablespoons of baking soda and 1 cup of vinegar and allow to soak for 30 minutes. This will help release any food debris left behind. Finally, simply rinse your pan and wash with mild dish soap.
Use on low to medium heat only
Stovetop Agnostic
Handwash Only
1
After removing the caution sticker from the handle, hand wash your kettle with warm, soapy water to remove any dirt or debris left over from the manufacturing and shipping process.
2
Wipe dry with a soft, non-abrasive dish towel to avoid scratching. The bottom surface of your kettle should be dry before touching a burner.
3
Never place an empty kettle on a hot burner or allow your kettle to boil dry without any water in it. This will damage your kettle and potentially your stovetop.
1
Fill the kettle with water up to the Max Fill line located inside the kettle. Overfilling the kettle will lead to spillage when boiling.
2
Never place your kettle on a burner larger than its base, or in an oven, microwave, or dishwasher.
3
Sliding across stovetops may damage your kettle or your stovetop (especially glass or induction). Always carefully lift it on and off.
4
Our kettle boils water more efficiently than traditional kettles, so low to medium heat is all you need. Lower heat will increase the longevity of your kettle and avoid causing damage to your stovetop.
5
For proper whistling, make sure to tightly place the lid on your kettle.
6
When you hear the whistle indicating the water has finished boiling, turn off your burner and wait approximately 20 seconds until the water ceases to boil. Do not pour boiling water from the kettle.
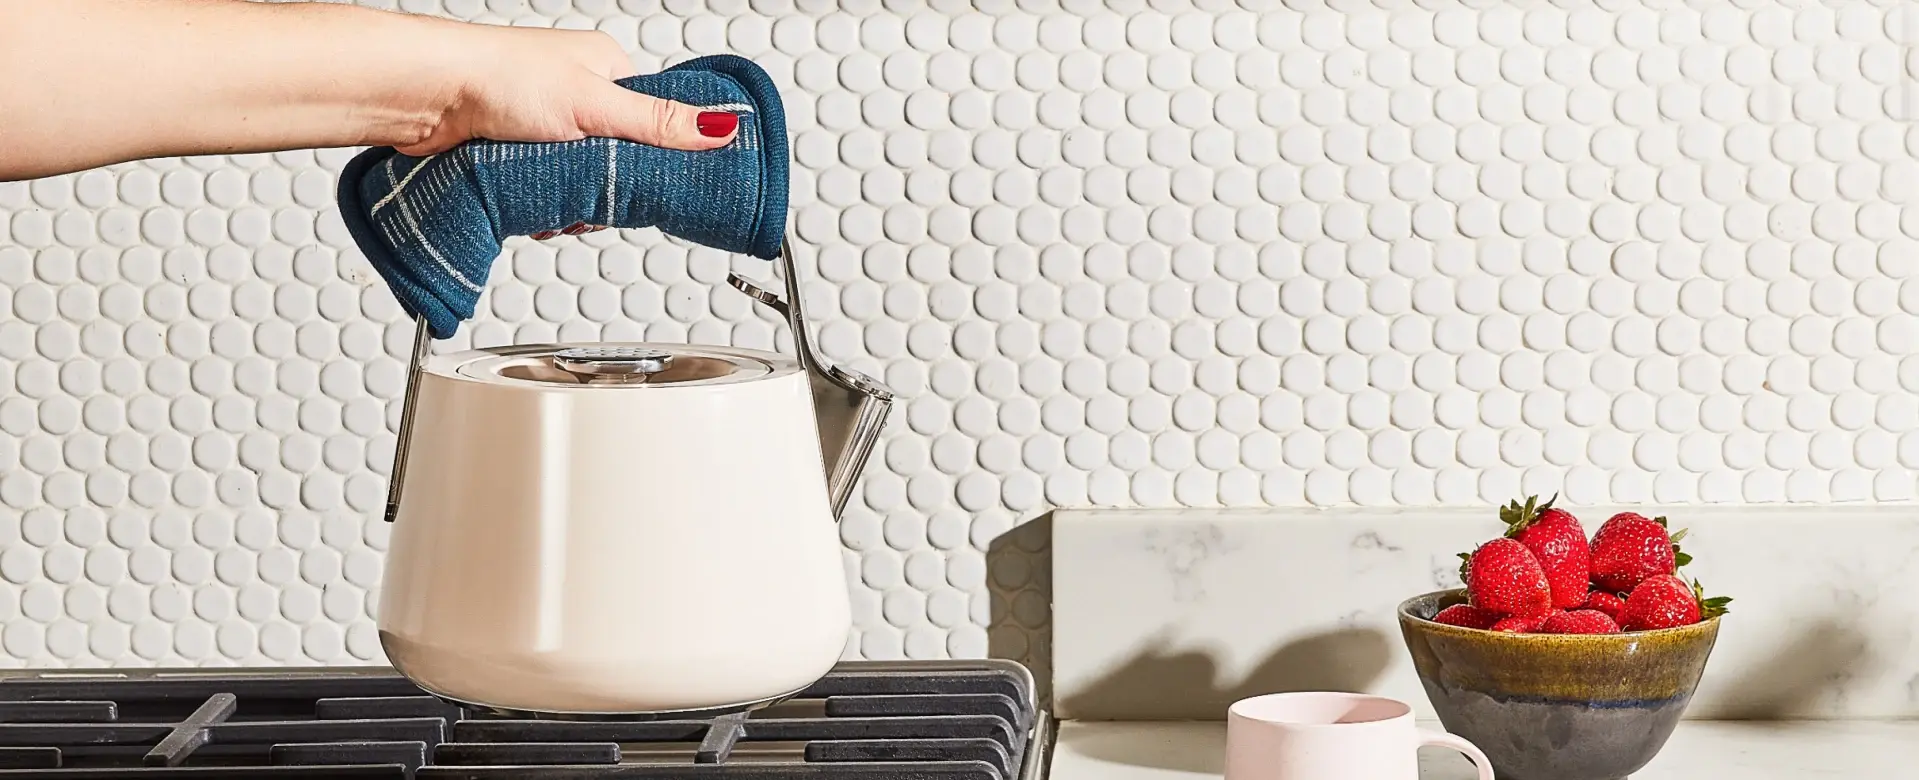
7
Always use the provided pot holder or mitt when removing the kettle from the burner or pouring, and do not remove the lid until fully cooled. Handles and lid will be hot to the touch and take 30 minutes to cool down after boiling.
8
Push the handle lever down until you feel a click or the spout is fully raised and locked into place in order to begin pouring.
9
To avoid spilling boiling water (not ideal for tea time), do not pour from the kettle unless the lid is closed and locked.
10
When setting down a hot lid or kettle, place on top of a pot holder or trivet to protect your kitchen countertops.
1
Always let your kettle cool completely (about 30 minutes) before allowing it to touch cold water in order to avoid thermal shock (meaning it might crack—yikes!).
2
All you need is a gentle scrub to keep your kettle in optimal condition. Never wash your kettle in the dishwasher.
3
Clean your kettle with warm, soapy water and a non-abrasive sponge until the kettle is spotless before storing. For tougher stains, try a wool sponge with strong detergent.
4
For any stains that can’t be removed with your sponge, there is nothing a melamine cleaning sponge can’t solve.
Our Tea Kettle contains a stainless steel body with an exterior non-toxic ceramic coating.
Our Tea Kettle does not include potentially toxic materials like PFOA, PTFE, other PFAs, lead, and cadmium. We also refrain from using any form of hard anodization.
Caraway’s Tea Kettle has a 2 QT capacity.

DISHWASHER SAFE

MICROWAVE, OVEN, REFRIGERATOR, AND FREEZER SAFE
Food Safe Materials
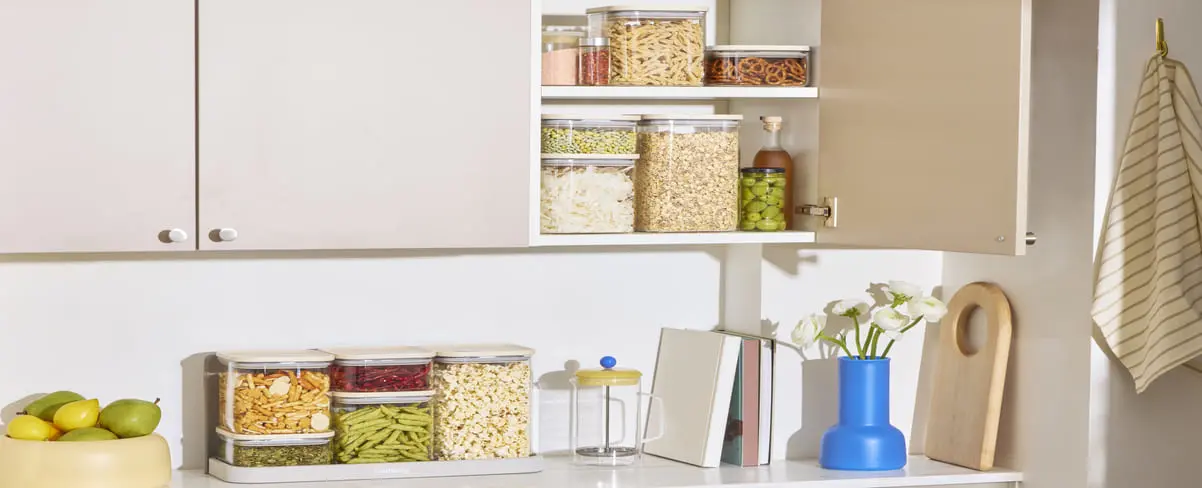
1
Hand wash all containers with warm, soapy water to remove any dirt or debris left over from the manufacturing and shipping process.
2
Wipe dry with a soft, non-abrasive dish towel to avoid scratching.
3
Your ceramic-coated glass containers do not play well with open flames, so stick to the microwave or oven.
1
Metal utensils may damage the non-stick coating, so stick to soft wooden, silicone, plastic, or nylon products.
2
Sliding across surfaces may damage the container's exterior coating. Always carefully lift and set down, and avoid dropping.
3
Always use a pot holder, oven mitt, or tea towel when removing your containers from a hot oven or microwave.
4
When removing from the oven or microwave, always set the hot container down onto a trivet, pot holder, or tea towel to prevent damage to your countertops.
5
Do not take containers directly from the freezer to a hot oven or microwave (this could cause your containers to crack—yikes!). Allow frozen food to thaw before reheating.
6
When using in a freezer or refrigerator, allow space in the containers for liquids or food to expand.
7
Allow hot food contents to completely cool before sealing and storing.
1
Follow your microwave’s instructions on heat settings and cooking time when defrosting, cooking, or reheating foods. Overheating for extended periods of time will damage your containers.
2
Remove the lids whenever microwaving your food containers.
3
Do not microwave an empty container.
4
Avoid using plastic wrap on or inside the container whenever microwaving. Plastic wrap can potentially heat, melt, and then adhere to the container walls.
5
Only the ceramic-coated glass containers can be used in the oven up to 450ºF, so be sure to remove all lids and inserts before they enter your oven.
6
Preheat your oven to your desired temperature before inserting your food containers. Avoid putting empty ceramic-coated glass containers into the oven without any food inside.
7
For your first few uses, closely monitor your heat setting to dial in on the perfect cooking temperature or oven time and adjust recipes as needed.
8
Not to be used under an oven’s broil setting.
1
Let your containers cool completely if you use the microwave or oven before installing the lid or running cold water over its surface to avoid melting or thermal shock, which can lead to cracks.
2
Wash your containers in the dishwasher on a normal wash cycle for a thorough, deep clean in between uses.
3
Whenever hand washing, clean your containers with warm warm, soapy water and a non-abrasive sponge until they are spotless before storing. For tougher stains, try a wool sponge with strong detergent.
4
Dry with a soft, non-abrasive dish towel or set containers in your storage racks to air dry completely.
5
When drying, remove the lids from each container so that air can dry the inside of your containers. Remember to remove the gasket on your container lids for a thorough dry.
6
For storing, we recommend utilizing your storage racks to keep your containers in mint condition. If stacking, place a protective sheath between container surfaces to minimize direct contact.
Our Food Storage is microwave, oven, refrigerator, and freezer safe! Please note, you should always remove your lid before placing your storage container in the oven or microwave. Follow your microwave’s instructions on heat settings and cooking time when defrosting, cooking, or reheating foods. Overheating for extended periods of time will damage your containers. Only the ceramic-coated glass containers can be used in the oven up to 450F, so be sure to remove all lids and inserts before they enter your oven.
(Not to be used under an oven’s broil setting)
Yes!
Our Food Storage is made out of non-toxic, non-stick ceramic coated glass
Our Food Storage Set’s coating does not include potentially toxic materials like PFOA, PTFE, other PFAs, BPA, BPS, lead, cadmium, or toxic metals. Message us for our test reports!
DISHWASHER SAFE
MICROWAVE, OVEN, REFRIGERATOR, AND FREEZER SAFE
Food Safe Materials
1
Hand wash with warm, soapy water to remove any dirt or debris left over from the manufacturing and shipping process.
2
Wipe dry with a soft, non abrasive dish towel. Let the containers and lids fully dry before storing ingredients to keep out excess moisture.
3
Ensure the Airtight Switch is properly seated into the mounting structure and opens/closes correctly. When open, the switch will magnetically snap into place, and should be fully flat to the surface of the lid when closed.
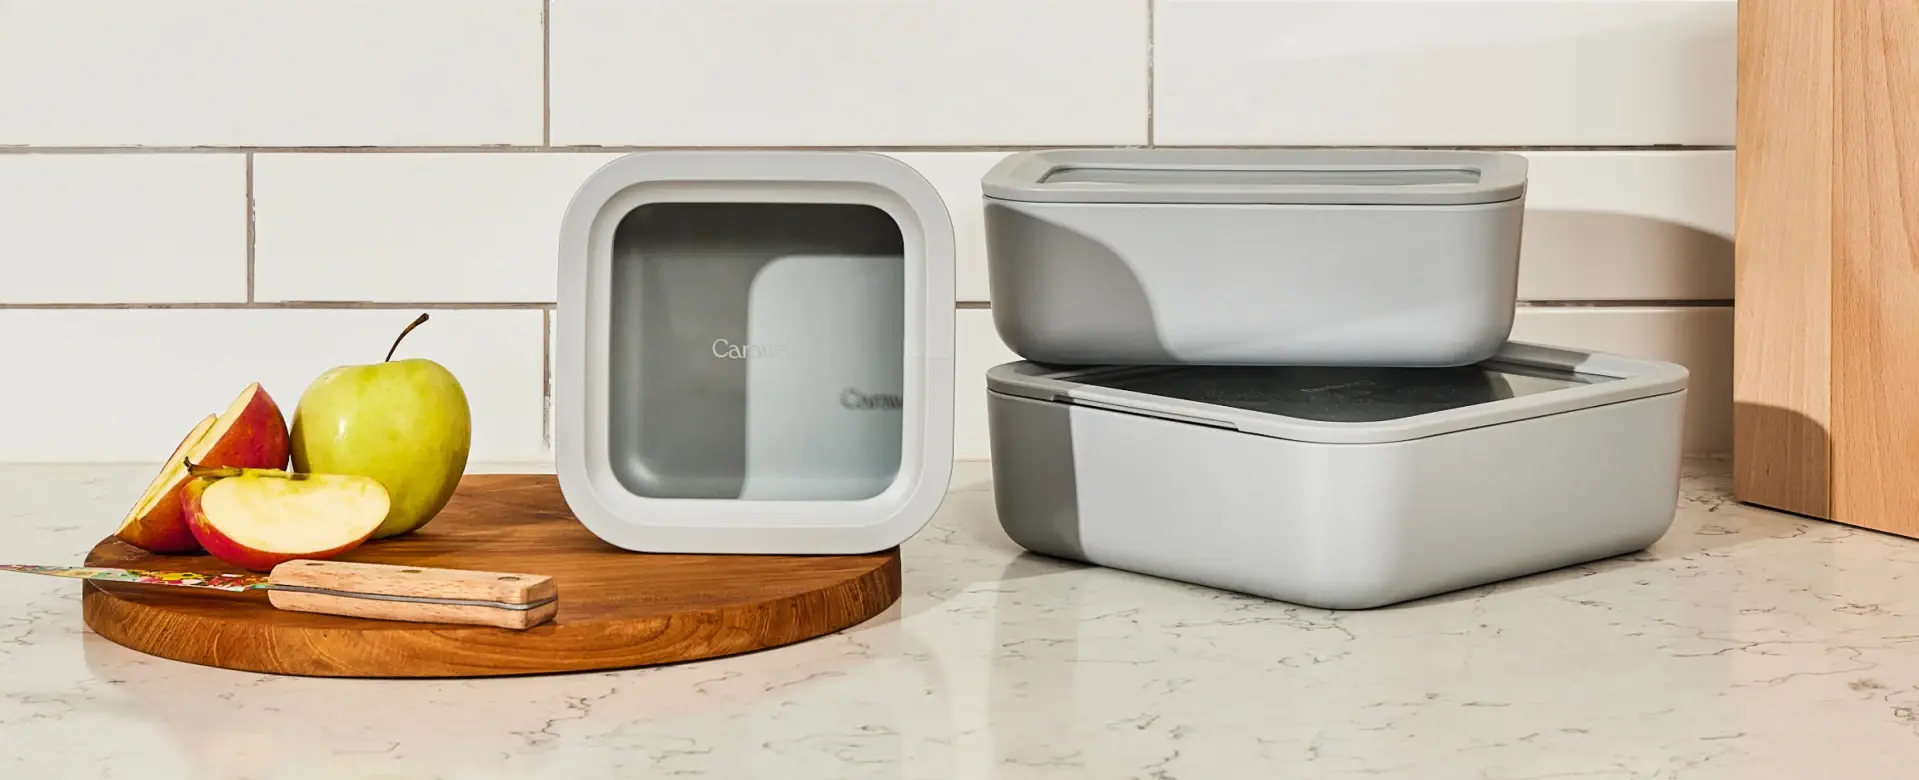
1
Each Glass Airtight Container is made from high-resistance, non-toxic borosilicate glass. This durable glass is scratch, stain, and impact-resistant, but will shatter if dropped or placed aggressively on hard surfaces. Use care when handling and moving.
2
Your Glass Airtight Containers arrive fully assembled. To open, press down on the finger indent on the stainless steel Airtight switch. This will release the True Airtight Seal and allow you to remove the lid by lifting from the outside edge.
When opened, the Airtight switch is magnetically held in place. A distinct and audible snap will sound when the Airtight Switch is toggled open.
3
Press the Airtight Switch down next to the “C” in Caraway until the switch is fully flat with the surface of the lid. This will activate the True Airtight Seal, ensuring the lid stays fixed to the container. If the switch is not fully flat, ensure that the connection with the mounting points is properly made.
4
Your Glass Airtight Containers can safely be used in the fridge and freezer (glass containers and lids), the microwave (glass containers only), or the oven (glass containers only) up to 450°F. Never place the lids and/or Airtight Switches in the microwave or oven.
5
Allow hot food contents to cool completely before securing the lid, activating the True Airtight Seal, and placing in the fridge or freezer.
1
Before swapping ingredients, clean both the glass containers and the lids to remove any remnants of their previous contents. Ensure the containers and lids are fully dry before storing new ingredients.
2
Remove the Airtight Switch and exterior gasket to clean the underside of the lid and underneath the switch, especially when storing powdery ingredients such as flour. Hand wash lid components with warm, soapy water and allow them to fully dry before re-installing.
3
For easy cleaning, the glass containers can be placed in the dishwasher. Do not put the lid and/or Airtight Switch in the dishwasher, as this will damage the gaskets and magnetic retention.
Borosilicate glass is more durable and resistant to thermal shock than standard glass. Borosilicate glass can safely handle hot and cold temperatures without breaking and is also non-porous, meaning it won’t absorb odors, stains, or chemicals from food. This makes it a safer, longer-lasting alternative to plastic or lower-quality glass storage options.
Yes! Our borosilicate glass is completely food-safe, BPA-free, and free from toxins like PFAS/PFOA and microplastics. Unlike some plastics, it won’t leach harmful chemicals into your food over time, making it a healthier choice for long-term storage. Plus, it’s non-reactive, so it won’t affect the taste or quality of your ingredients.
Yes! We designed the bottom corners to stack compactly with the Airtight Containers.

FSC-Certified Birch Wood

Premium German Steel Blades
Handwash Only

1
Hand wash all knives & utensils with warm, soapy water to remove any dirt or debris left over from the manufacturing and shipping process.
2
Wipe the inside surface of the tray and bin with a damp cloth before setting them on your countertop.
3
Dry all items with a soft, non-abrasive dish towel to avoid scratching after washing.
4
Your Wood Utensils, Knife Block, and Utensil Bucket come pre-treated, so no need to oil or wax these items before or after use.
1
Always hand wash your utensils immediately after use with warm soapy water. Ensure you wash both sides of the utensil to avoid uneven drying. Steer clear of submerging your utensils in water or dish soap so they do not warp.
2
Warping & cracking can occur as wood contracts and expands. When drying, stand your utensils upright on your counter or wipe down with a dish towel to remove excess water prior to storing.
3
To disinfect, sprinkle the affected area with kosher salt, squeeze lemon juice over, and use the lemon to rub the mixture over the area. Allow the paste to dry, and gently wipe off. Alternatively, you can use a solution of 25% distilled white vinegar and 75% water. Do not use bleach or baking soda on your utensils as they may cause damage.
1
Avoid surfaces that can dull or damage your knives such as fine china, marble, granite, tile, porcelain, stainless-steel countertops, and glass. We recommend using wooden or quality plastic cutting boards for the ideal stable surface.
2
All you need is a gentle scrub to keep your knives in optimal condition. Avoid dishwashing or submerging in water as it can affect the longevity of your knives.
3
To minimize patina when cutting highly acidic foods, occasionally rinse the blade clean in between chops.
4
Over time, stainless steel knives lose their shine. To restore, rub white vinegar, lemon juice, or a food-safe stainless steel cleaner over the blade with a dishcloth.
5
For blade maintenance, regularly sharpen your knives before use and store them in the provided Knife Block. Keeping knives loose in a drawer or dishwashing will dull the blades and risk accidentally getting cut.
6
Scraping food off a cutting board with your blade will dull it over time. Instead, flip the knife around and use the topside when scraping.
Of course! Do remember that these knives are sharp. Use caution when taking them in and out of the knife block and follow the curvature of the internal bumper.
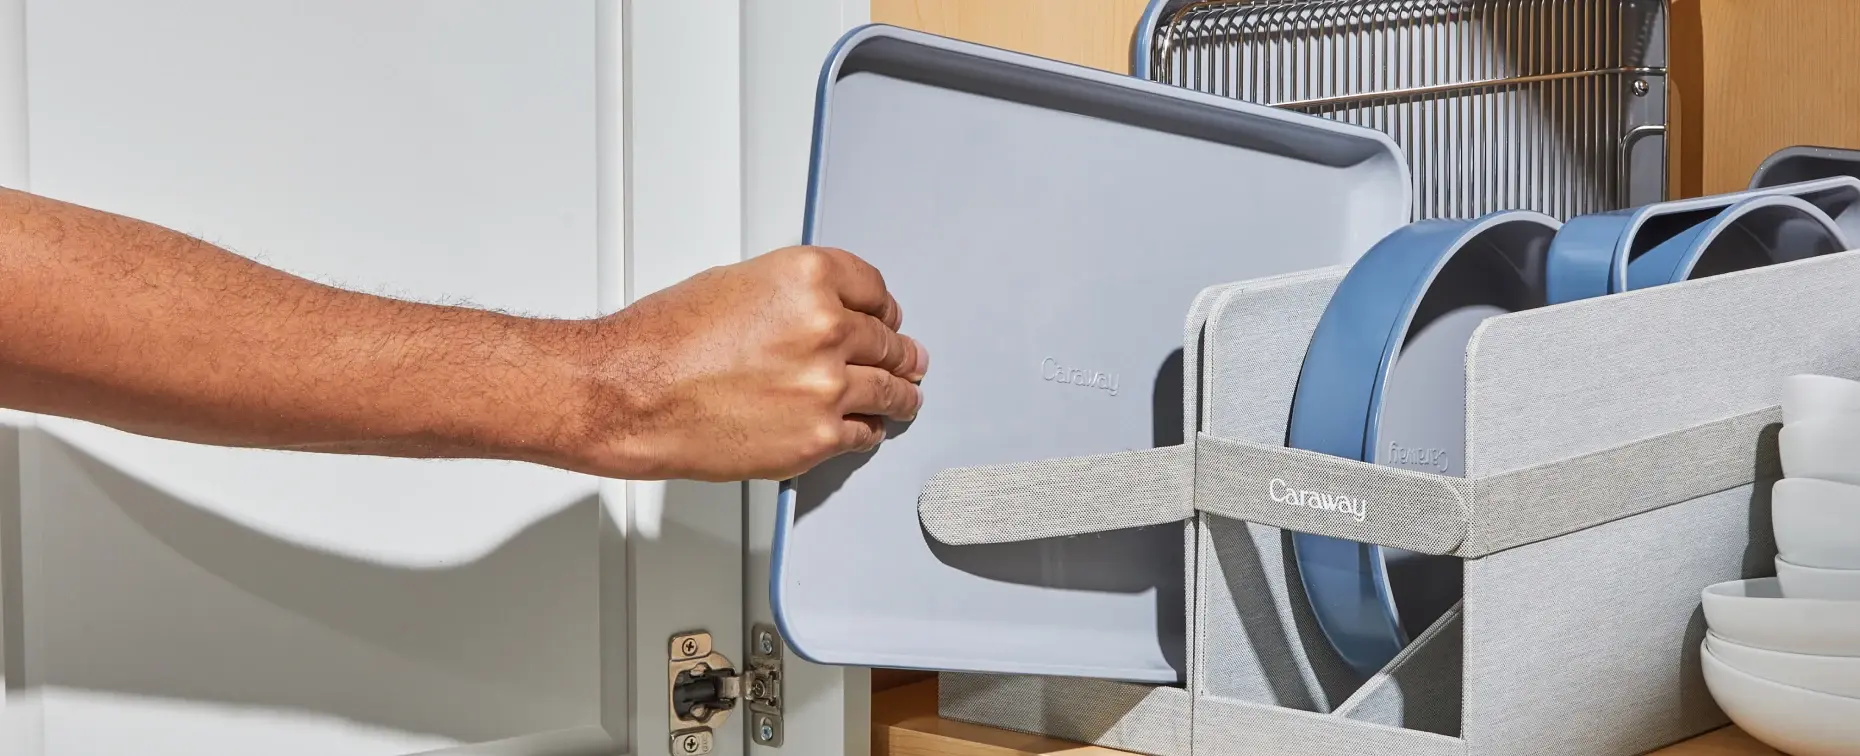
All storage pieces are modular and can easily be removed and put back together.
We recommend using a honing rod every 5 uses, and a knife sharpener 1-2 times per year. With that in mind, remember that a sharp & precise knife is always safer than a dull one.
FSC-Certified Wood

Mineral Oil & Wax Finish
Handwash Only
1
Always hand wash both sides of your Cutting Boards immediately after use with warm soapy water. Don’t submerge your boards in water or place them in a dishwasher. If you’re cutting something that doesn’t need a rinse, stay clear of water to extend the longevity of your boards.
2
Warping & cracking can occur as wood contracts and expands. When drying, always stand your boards upright on your counter or in their organizer to allow them to dry evenly.
3
To extend each board’s longevity, apply mineral oil with a clean cloth once a month. Let oil set for a few hours before wiping dry with a cloth. For an extra shine, apply food-grade beeswax once dry. Do not use vegetable or nut-based oils on your boards.
4
To disinfect stains, squeeze fresh lemon juice directly onto your boards with a sprinkle of kosher salt, using the lemon to rub the mixture across the entire area. Once dry, gently scrape off. Alternatively, use a solution of 25% distilled white vinegar and 75% water. Do not use bleach or baking soda on your boards.
Dishwashers are notorious for their abrasive ways of cleaning and tend to cause wooden boards to splinter. Because of this, we suggest handwashing your boards to keep them in pristine condition.
To extend each board’s longevity, apply mineral oil with a clean cloth once a month. Let oil set for a few hours before wiping dry with a cloth. For an extra shine, apply food-grade beeswax once dry. Never use vegetable or nut-based oils on your board.
To disinfect stains, you can squeeze fresh lemon juice onto your boards with a sprinkle of kosher salt, using the lemon to rub the mixture across the entire area. Once dry, gently scrape off. Alternatively, use a solution of 25% distilled white vinegar and 75% water. Never use bleach or baking soda on your boards!
Dishwasher Safe
Max-oven-heat 425

Tempered Glass

1
Our Glass Lids were designed to go from the stove to the oven and can handle a maximum temperature of 425°F.
2
Allow Glass Lids to completely cool before running cold water over their surfaces to avoid thermal shock (which will affect the performance and longevity of your lids).
3
Our Glass Lids are dishwasher safe. When hand washing, we recommend cleaning with warm, soapy water and a non-abrasive sponge until spotless.
Yes! The Glass Lids are made with premium & thick tempered glass, which can last years with proper care.
Other than not using in the oven beyond 425ºF, the Glass Lids can be used interchangeably with your existing Caraway lids.
The Lid Organizer can fit up to 4 of any of Caraway’s ceramic-coated, stainless steel and glass lids.
Yes, the Glass Lids can fit in the Cookware Set-exclusive hanging canvas Lid Holder (that is able to fit up to three lids). The new Lid Organizer offers you a new & extra way to store your lids.
Caraway offers a warranty policy of one year from date of purchase of the Glass Lids & Lid Organizer.
Handwash Only

Easy to Clean

1
Rinse with warm water and dish soap immediately after use to prevent items from sticking. Towel dry and allow to dry in a dish rack. We recommend letting the products dry fully before placing them in the included storage rack.
2
The high heat of dishwashing and harsher washing cycles may lead to pit corrosion, wear sharp edges more quickly, and cause other issues.
3
Do not place close to the oven, freezer, or refrigerator. Subjecting stainless steel to extreme temperatures may adversely affect the material properties, leading to corrosion, cracking, or other defects.
Our Kitchen Gadgets are evenly-weighted, with the heaviest one (Garlic Press) weighing less than a box of pasta. While heavier than some plastic alternatives, we’ve chosen the lightest quality materials that still provide enhanced performance.
The blades come factory-sharpened and will retain their edge for extended periods of time. We do not recommend sharpening at home, as this may damage the blades or risk injury.
The Garlic Press separates into 2 halves: the “hopper” and the “press head.” Ingredients are loaded into the hopper side. To detach, rotate the handles so they’re approximately 90 degrees apart and lift the press head up vertically.
Free Shipping On Orders $90+
Free Returns
30-Day Trial
Save 20% when you spend $875+
20% Off
Spend $875
Unlock Prime Savings
Save 20% when you spend $875+
20% Off
Spend $875