Your Cart is Empty
Get started with the Caraway essentials!
Free Shipping On Orders $90+
Free Returns
30-Day Trial
Home & Kitchen with Caraway
You roll out the dough, press the perfect shape, pop it in the oven, and out comes a puffy blob that looks nothing like the cookie cutter you started with. Sound familiar?
At Caraway , we’re all about helping you skip the kitchen chaos and get the results you actually planned for. So, if you’re tired of warped stars, melted hearts, and snowmen that look like ghosts, we’ve got you covered.
Here’s how to make cut-out cookies that hold their shape every single time.
This matters more than people realize. Some cookie recipes are made to spread—cut-out cookies are not. Avoid anything with baking powder or baking soda . Those ingredients make cookies rise, which is the opposite of what you want when the shape is the goal.
Stick with doughs that are firm and low in moisture. Sugar cookie dough, shortbread, and gingerbread are reliable options. If you’re using a new recipe, check that it’s specifically designed for cut-out cookies, or be prepared to tweak.
Warm dough spreads . Always chill the dough after mixing (at least an hour), then again after you’ve rolled and cut your shapes (15-30 minutes). This gives the butter in the dough time to firm back up before it hits the oven, which is key to keeping everything in place.
This isn’t optional. If you want sharp edges, you have to give the dough time to set. You can even freeze it briefly if you're short on time.
For cookies to bake evenly and hold their shape, you need two things: consistent dough and the right tools.
Start by rolling your dough to about ¼ inch thick. Uneven dough bakes unevenly —too thin and the edges warp, too thick and the centers don’t set properly. Use rolling pin guides or check by eye, but keep it even. And while a light dusting of flour is fine to prevent sticking, too much can dry out your dough and change the texture.
Next: cutters. Not all are equal. Metal cutters with sharp edges give you the cleanest results. Avoid plastic cutters if you can—they’re more likely to drag the dough or blur fine details. And skip overly intricate designs unless you’re working with very firm dough (or lots of patience). Simple shapes are easier to transfer and hold up better in the oven.
Cut close together to minimize scraps and avoid overhandling. The more you reroll the dough, the tougher it gets and the harder it is to keep those crisp edges.
Once your shapes are cut, transfer them to a baking sheet with care. This is where the surface underneath really matters. Greasing a pan encourages spreading, so skip it. Use parchment—or better yet, go straight onto a Caraway ceramic-coated baking sheet for clean edges and easy release without any added fat.
Our non-toxic bakeware is designed for even heat and low-effort cleanup, which is especially helpful when you’re working through multiple trays.

One last thing: space matters. Even the best dough needs a little room. Give each cookie about an inch or two of breathing room to avoid crowding, spreading, or shapes running together in the oven.
For cut-outs, baking at a slightly lower temperature—325°F to 350°F—gives the cookies time to set before the edges brown. Keep a close eye toward the end of the bake. Cookies should look matte, with slightly firm edges and no shine on top. If they hold their shape and feel just set, they’re ready to come out.
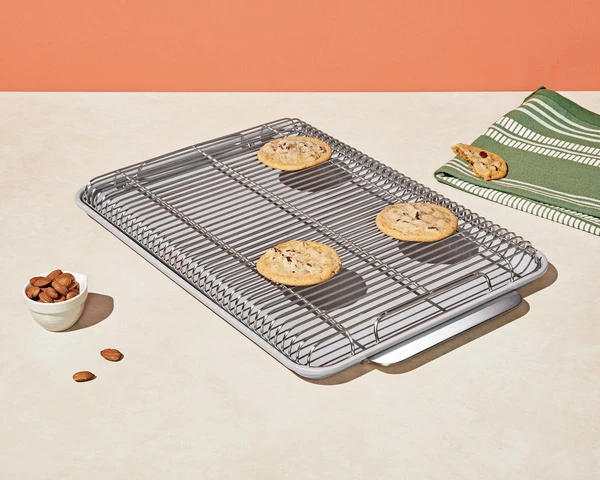
Let them cool on the baking sheet for a few minutes to avoid breakage, then transfer them to a cooling rack to finish. This helps release any trapped heat and keeps the bottoms from turning soft or overly crisp. Our 18x13" Cooling Rack nests inside the Large Baking Sheet , so it’s easy to keep your setup clean, organized, and batch-ready.

Don’t rush the icing. Even a little leftover warmth can melt your decorations or cause them to slide off. Let cookies cool completely on the rack before adding any frosting, glaze, or details.
If you’re using royal icing or piped details, work in batches and let each layer set before adding the next. A clean, crisp cookie gives you a better decorating surface and helps designs stay sharp.
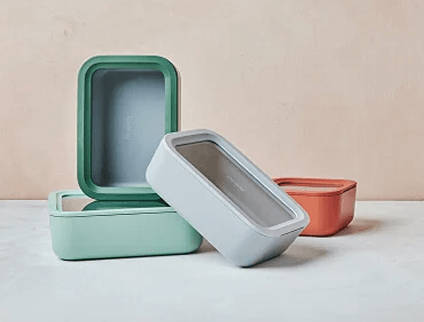
After your cookies are fully cooled and decorated, it’s all about protecting the texture and shape. Keep them in a dry, airtight container to prevent softening or going stale, especially if they’ll be sitting for a few days.
Our Glass Airtight Container Set is ideal for this. The tight seal keeps out moisture, while the stackable design makes it easy to separate different shapes or flavors. Layer cookies between parchment if they’re frosted, and avoid stacking too high to keep your designs intact.
Note: Properly stored cookies can last about one to two weeks at room temperature, or up to three months in the freezer.
Perfect cut-out cookies don’t come down to luck—they come down to prep, precision, and the right tools. With a little planning (and a chill or two), you can skip the blobs and bake cookies that hold their shape from oven to icing.
At Caraway , we’re here to make every step easier with non-toxic, easy-to-clean essentials that support the way you actually cook and bake. Whether you’re tackling a holiday batch or just making something fun for the weekend, the right setup makes all the difference.
Explore our bakeware essentials today to bring more clarity, confidence, and consistency to your kitchen. Trust us—you’ll be glad you did.
Sources:
Baking Soda vs. Baking Powder - What's the Difference? | Food Network
Here's Why Your Cookies Spread When They're Baked—and How to Prevent It | Martha Stewart
Cookie-Baking Chemistry: How To Engineer Your Perfect Sweet Treat | NPR
Get started with the Caraway essentials!
Free Shipping On Orders $90+
Free Returns
30-Day Trial