Almost there! You're $90.00 away from free shipping
Your Cart is Empty
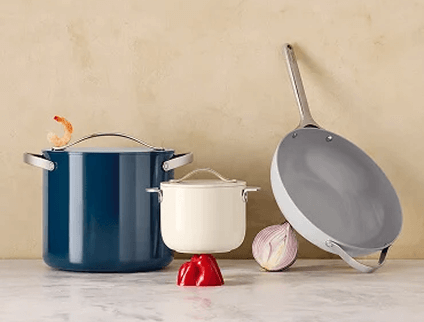
Get started with the Caraway essentials!
Free Shipping On Orders $90+
Free Returns
30-Day Trial

Sustainably Sourced

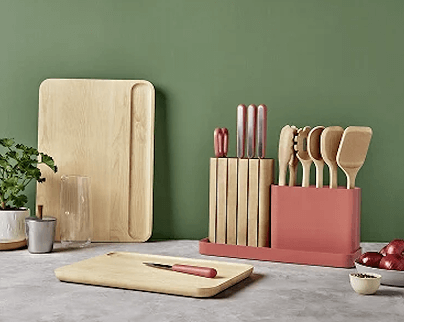
Mineral Oil & Wax Finish
Handwash Only

1
Always hand wash both sides of your boards with warm, soapy water. Don’t submerge them in water or place them in a dishwasher. If you’re cutting something that doesn’t need a rinse, stay clear of water to extend the longevity of your boards.
2
Warping & cracking can occur as wood contracts and expands. When drying, always stand your boards upright on your counter or in their organizer to allow them to dry evenly.
3
To extend each board’s longevity, apply food-grade mineral oil with a clean cloth once a month. Let oil sit overnight before wiping dry.
For an extra shine, apply food-grade beeswax once dry. Do not use vegetable or nut-based oils on your boards.
4
To disinfect stains, squeeze fresh lemon juice directly onto your boards with a sprinkle of kosher salt, using the lemon to rub the mixture across the entire area. Once dry, gently scrape off. Alternatively, use a solution of 25% distilled white vinegar and 75% water. Do not use bleach or baking soda on your boards.
Dishwashers are notorious for their abrasive ways of cleaning and tend to cause wooden boards to splinter. Because of this, we suggest handwashing your cutting boards and butcher blocks to keep them in pristine condition.
To extend each board’s longevity, apply food-grade mineral oil with a clean cloth once a month. Let oil set overnight before wiping dry with a cloth. For an extra shine, apply food-grade beeswax once dry. Never use vegetable or nut-based oils on your board.
To disinfect stains, you can squeeze fresh lemon juice onto your boards with a sprinkle of kosher salt, using the lemon to rub the mixture across the entire area. Once dry, gently scrape off. Alternatively, use a solution of 25% distilled white vinegar and 75% water. Never use bleach or baking soda on your boards!
Easy Bag Changes
Fingerprint Resistant
Quiet by Design

1
Carefully remove the trash can from packaging, along with any internal packaging inside of the can. Place the can where you’d like to use it, using the back handle to transport.
2
Your trash can is designed for effortless hands-free disposal. Gently press your foot on the pedal to open the lid, then release the pedal to close. Your trash can is designed with a quiet-close lid that closes gently without slamming.
3
To empty and change bags, press the foot pedal to lift the lid, then manually lift the inner rim to 90 degrees, where it will click into place and lock open. Lift the inner bin out using the side handles. Remove the bag and replace it with a new one. Carefully lower the inner bin back into place, which will secure the bag.
4
Your trash can is finished with a rust, smudge, and fingerprint-resistant coating and easy-wipe interior. To clean, wipe the exterior with a soft, damp towel and a mild, non-abrasive cleaner. Avoid using harsh chemicals or abrasive materials, as these can damage the finish.
5
The inner bin of your trash can is fully removable for easy, thorough cleaning. Remove it from the exterior bin and wash with warm, soapy water. Rinse thoroughly and dry completely before returning it to its place.
1
Carefully remove the recycling bin from packaging, along with any internal packaging inside of the drawers. Place the bin where you’d like to use it, using the back handle to transport.
2
Your recycling bin is designed for effortless sorting and has two drawers so you can organize recyclables by material. Place items directly into the drawers by pulling on the handles or use the top hatch for quick disposal. Please note: the drawers will slide out completely if pulled too far. To avoid tipping, never leave your bin unattended with open drawers.
3
Your recycling bin drawers slide all the way out so you can easily carry them from the kitchen to the curb. To empty your bin, pull the drawer out and use the front handle and rim to carry it to your curbside recycling bin. When reinserting, line up the rim of the drawer with the slots on both sides, then push in.
4
Your recycling bin is finished with a rust, smudge, and fingerprint-resistant coating. To clean, wipe the exterior with a soft, damp towel and a mild, non-abrasive cleaner. Avoid using harsh chemicals or abrasive materials, as these can damage the finish.
5
The inner drawers of your recycling bin are fully removable for easy, thorough cleaning. Remove them from the exterior bin and wash with warm, soapy water. Rinse thoroughly and dry completely before returning them to the bin.
Handwash Only

Easy to Clean

1
Rinse with warm water and dish soap immediately after use to prevent items from sticking. Towel dry and allow to dry in a dish rack. We recommend letting the products dry fully before placing them in the included storage rack.
2
The high heat of dishwashing and harsher washing cycles may lead to pit corrosion, wear sharp edges more quickly, and cause other issues.
3
Do not place close to the oven, freezer, or refrigerator. Subjecting stainless steel to extreme temperatures may adversely affect the material properties, leading to corrosion, cracking, or other defects.
Our Kitchen Gadgets are evenly-weighted, with the heaviest one (Garlic Press) weighing less than a box of pasta. While heavier than some plastic alternatives, we’ve chosen the lightest quality materials that still provide enhanced performance.
The blades come factory-sharpened and will retain their edge for extended periods of time. We do not recommend sharpening at home, as this may damage the blades or risk injury.
The Garlic Press separates into 2 halves: the “hopper” and the “press head.” Ingredients are loaded into the hopper side. To detach, rotate the handles so they’re approximately 90 degrees apart and lift the press head up vertically.
Almost there! You're $90.00 away from free shipping
Get started with the Caraway essentials!
Free Shipping On Orders $90+
Free Returns
30-Day Trial