Almost there! You're $90.00 away from free shipping
Your Cart is Empty
Get started with the Caraway essentials!
Free Shipping On Orders $90+
Free Returns
30-Day Trial
Home & Kitchen with Caraway
Key Takeaways
A clean kitchen is easier to maintain when cleaning is broken into daily, weekly, and monthly rhythms instead of one big reset.
Cleaning in the right order, from top to bottom, saves time and prevents surfaces from getting dirty again.
Simple habits like cleaning as you go and using the right tools reduce mess and stress without adding effort.
Having a clean kitchen is essential. It’s as simple as that. No matter the reason, there’s something undeniably satisfying about having a spotlessly clean kitchen.
And we all know that a clean kitchen doesn’t happen by accident. What actually works is having a simple rhythm: knowing what to reset daily, what needs a weekly refresh, and what’s worth saving for deeper cleans.
This guide is designed to make kitchen cleaning feel manageable, not overwhelming. You’ll find practical tips you can use in real life, plus easy checklists, a smart order of cleaning, and a few safety notes that help you clean more efficiently without overdoing it.
Whether you’re trying to keep up during busy weeks or reset after a messy cooking stretch, this is a flexible system you can adapt to your space, your schedule, and your habits.

A clean kitchen stays clean when tasks are spread out instead of saved for one exhausting reset. The goal isn’t perfection. It’s rhythm.
These three checklists break kitchen cleaning into short, realistic moments that fit into everyday life.
This is your quick close-out. Think of it as setting yourself up for tomorrow.
Wipe down counters after the last meal
Load or run the dishwasher, or hand-wash what’s left
Quick sink wipe and rinse
Spot-clean the stovetop if anything splattered
Shake crumbs into the trash or compost
Check the trash and take it out if it’s close to full
A few minutes at the end of the day prevents buildup. When surfaces are already mostly clean, tomorrow’s mess never feels overwhelming.
This is where things start to feel truly clean again.
Wipe down fridge shelves and door bins
Steam-clean the microwave with water and lemon
Clean cabinet fronts and drawer pulls
Wipe backsplash and wall splatters
Mop the floor after sweeping
Rinse out the trash can
Disinfect high-touch spots like handles and knobs
Weekly cleaning tackles the places you touch constantly and the messes you stop noticing. Doing it once a week keeps grime from settling in.
This is your reset button. No rush. Spread it out over a weekend if needed.
Deep clean the oven interior
Wash or replace the range hood filter
Empty and deep-clean the refrigerator
Descale the kettle or coffee maker
Purge the pantry and wipe shelves
Clean behind and under small appliances
These tasks don’t need constant attention, but skipping them for too long can lead to odors, buildup, and frustration. Monthly or seasonal timing keeps everything running smoothly.
You don’t need to do every item perfectly or all at once. Even checking off a few things from each list keeps your kitchen feeling lighter and more functional. A clean kitchen is about knowing when to clean and what actually matters.
This checklist gives you structure without pressure. Use it as a guide, not a rulebook.

If kitchen cleaning ever feels harder than it should, it’s usually because of the order. Jumping between surfaces or cleaning something twice wastes time and energy. A top-to-bottom workflow keeps things efficient, prevents dirtying clean areas, and helps you actually feel done.
Here’s a simple sequence that works whether you’re doing a quick reset or a deeper clean.
Before you touch a sponge or spray, clear the space.
Load the dishwasher or soak dishes
Put food away
Toss trash and recycling
Move small appliances off the counter if needed
This gives you a clean slate and keeps crumbs and splashes from spreading while you clean.
Pro tip: Keep a small bin nearby for things that belong elsewhere so you don’t leave the kitchen mid-clean.
These are the spots that collect germs fastest and often get overlooked.
Cabinet and drawer handles
Appliance handles
Light switches
Faucet handles
Wiping these early prevents spreading bacteria back onto clean surfaces later.
Pro tip: Let the cleaner sit for 30–60 seconds before wiping so it actually works.
Now move to the bigger surfaces.
Microwave interior and exterior
Stovetop and knobs
Oven door and control panel
Dishwasher exterior
Work from the highest surface down. That way, any crumbs or residue will fall onto areas you haven’t cleaned yet.
Pro tip: Steam-clean the microwave with a bowl of water and lemon to loosen stuck-on mess without scrubbing.
Once appliances are done, it’s time for the main workspace.
Wipe countertops thoroughly
Clean backsplash and grout lines
Pay attention to corners and seams
Use smooth, overlapping motions so you’re not just moving mess around.
The sink is your final rinse station, so save it for last.
Wash or rinse cleaning tools
Scrub sink basin and drain
Polish faucet
Ending with the sink keeps everything else clean once you’re done.
Always finish at ground level.
Sweep or vacuum first
Mop after the crumbs are gone
This prevents dragging debris across clean floors and gives the whole kitchen a finished feel.
Pro tip: Work toward the exit, so you don’t walk back over freshly cleaned floors.

Cleaning top to bottom keeps gravity on your side, reduces repeat work, and helps you move through the kitchen once instead of bouncing around. It’s faster, cleaner, and way less frustrating.
Without further ado, here are our favorite tips and tricks for keeping your kitchen spick and span.
You already knew this one, but we’ll say it again: start with a clean kitchen and keep it clean.
The best form of damage control is prevention. So, yes, for many of us, this will mean doing an initial clean to get back to a clean slate. From there on out, keeping it clean is so much easier.
Another good rule of thumb is never to start cooking (or any kitchen task) until the space is relatively clean. Starting a task already having little messes here and there makes it that much easier to just pile on more mess.
If you start with a clean kitchen, you’ll be more motivated to keep it clean. (Plus, it's easier to maintain).
We know walking down the kitchenware aisle can feel a lot like being a kid in a candy store. As cool and exciting as all of the specialty gadgets and gizmos can be, try to be selective and think about which ones will actually get used and which will end up gathering dust in the cupboard.
Kitchen clutter is almost as bad as physical messes. A cluttered counter is a cluttered mind, and neither of these is ideal for your Top Chef brain to work its magic.
Consider doing a thorough Marie Kondo clean in your kitchen. This method entails bringing everything out in the open, then putting back only the items that spark joy or add value to your life.
After a good decluttering, you’ll have more counter space, shelf and cupboard space, and just brain space to let your creative cooking juices run wild and free. But seriously, even if you don’t do a full Marie Kondo, take a look at everything you have and see what you can do without.
Having more space helps with motivation to wipe counters, keep things in place, and supports every kitchen to feel more open.
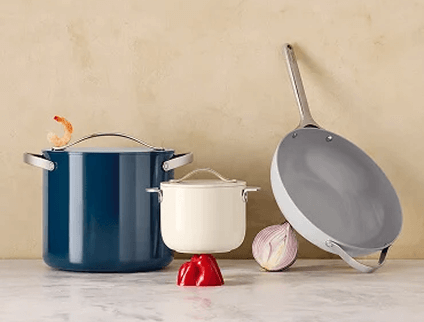
This next suggestion goes beyond aesthetics and takes a deep dive into “clean cookware.”
What if we told you that 95% of non-stick pots and pans are made with harsh, toxic chemicals? And then what if we told you that after only two and a half minutes at high heat (500° Fahrenheit), the very same cookware begins leaching its chemicals into the food we’re cooking?
Unfortunately, this is all true. Over 95% of non-stick pots and pans are made with a chemical called Polytetrafluoroethylene. While brands don’t like putting a scary word like this on their labels, you probably have seen the term, Teflon® printed on cookware.
According to Cancer.org, one of Teflon®’s main ingredients is a man-made chemical called Perfluorooctanoic acid (PFOA), or C8. This chemical is recognized as a “forever chemical,” meaning it stays in your body forever once ingested, no matter how small the amount. To make matters worse, they also never break down in the environment.
A 2019 study found that it only takes traditional non-stick pans two and a half minutes to heat up to 500° degrees, the temperature where the chemicals begin to break down and release into your home. Many stoves heat up to 1600° on high heat, meaning you are (most likely) leaching chemicals with every meal you make.
Cue, 100% non-toxic cookware, AKA clean cookware . Ceramic is a 100% non-toxic mineral-based coating, free of harsh chemicals of any kind. Not only is it much safer, giving you peace of mind, but ceramic is also a naturally slick (non-stick) surface, so much so that you can cut down on the amount of oil and butter you use while cooking.
When it comes to “keeping a clean kitchen,” take your kitchen game to the next level with ceramic-coated cookware. It’s not too late for some spring cleaning, and your kitchen could use a new, clean, and healthy Fry Pan , Sauté Pan , Sauce Pan , and Dutch Oven , all of which can be found as part of our one and done Cookware Set .
Whenever there’s a spare moment, seize the moment! Whether it be when the water is boiling, when the microwave is ticking down, or as something cools, use any spare time wisely!
Cleaning as you go (between tasks of a certain recipe) and cleaning as you wait are some easy ways to maximize your time and cut down on the mess you’ll be left with afterward. This is as simple as putting away tools after using them and throwing utensils straight into the dishwasher.
A quick wipe here and a quick put-away there, and you’ll be amazed at how much of the cleaning is already done by the time you get started.
Your kitchen linens and sponges are usually the tools doing the cleaning, but we can’t let them be forgotten themselves. Bacteria thrive in warm, wet environments. Sponges and linens, when damp and dirty, make for the perfect breeding ground.
Linens like kitchen towels, Tea Towels , Linen Aprons , and even the Oven Mitts and Pot Holders should be cleaned or rotated at least once a week. Ideally, keep different tea towels for different tasks: one for cleaning the counters, one for spillage, one for moving dishes around, etc. This type of system will also help prevent cross-contamination.
You should also be sure to replace your sponges every two weeks, or as soon as they begin to fall apart or develop an odor. Replacing your sponges is an important way to prevent the spread of bacteria and viruses that can cause illnesses.
If you want to be eco-friendly, purchase reusable sponges that you can wash in your dishwasher or washing machine alongside your linens to stay sanitary while going green.

Basically, never go to bed with a dirty kitchen. If, for some reason, you haven’t already been cleaning-as-you-go or cleaned up after dinner, try your best to get this done before you head to bed!
Starting your next day by coming down to a dirty kitchen isn’t exactly starting the day off on the highest note. Give your next morning the best vibes possible by cleaning up the kitchen the night before.
So, at the end of the day, when you’re doing other nighttime tasks like turning the lights off, turning off the TV, and kissing the dog goodnight, try “closing the kitchen,” too. For anyone who's worked any position at a restaurant, you know what we’re talking about.
We’re talking about clearing and wiping the counters, making sure all food is stored properly and put away, running the dishwasher, maybe taking out the garbage. Closing the kitchen each night will set the right tone for your next morning and help you feel even better about jumping into bed.
It’s a subconscious thing, for sure, but all it takes is one fork, spoon, or little plate, and something in our brain makes it that much easier to start piling on everything else. Messes beget messes.
In the same way that a clean counter is better at staying cleaner, an empty sink is better at staying emptier. It doesn’t take too long to develop a good habit of either rinsing or washing things straight away before putting them in the dishwasher or onto the drying rack.
Try playing a little game with yourself to keep the sink empty, and remember to let the rest of the household in on the fun.
These are the little things that keep messes from snowballing. None of them takes more than a few minutes, but together they make the kitchen feel consistently under control.
Before leaving the kitchen, give the sink a quick rinse and wipe. Clearing out food bits and water spots keeps odors from building and makes the next cleanup easier. A clean sink sets the tone for the rest of the space.
While something simmers or bakes, use that time to wipe counters or rinse tools. You’re already there, and those few minutes prevent mess from hardening or spreading. Cooking feels lighter when cleanup happens in real time.
Try to only touch items once. If something is in your hand, put it where it belongs instead of setting it down “for later.” This simple habit cuts clutter fast and keeps counters from filling up unintentionally.
If cleaning supplies live under the sink, they’re easy to forget. Keeping a spray bottle and cloth within reach makes quick wipe-downs feel effortless and more likely to happen.
Sponges wear out faster than most people realize. Rotating them weekly or replacing them every couple of weeks helps keep surfaces cleaner and prevents lingering smells from spreading around the kitchen.
Crumbs collect quickly and can lead to burnt smells or pests. Emptying the crumb tray once a week takes seconds and keeps the area around the toaster cleaner overall.
These areas don’t need daily attention, but a little consistency goes a long way.
Heat a bowl of water inside the microwave for a few minutes, then wipe it out. Steam loosens splatters so you don’t have to scrub, and it keeps odors from lingering.
Grease is easier to remove when it’s fresh. After cooking, let the surface cool slightly and wipe it down before residue hardens and requires stronger cleaners later.
Wipe stainless steel in the direction of the grain using a damp cloth, then dry immediately. This prevents streaks and keeps appliances looking polished without extra products.
A small open container of baking soda or coffee grounds helps absorb lingering smells. Pair that with a quick shelf wipe each week to keep things fresh.
Food buildup in the filter can cause odors and reduce cleaning performance. Rinsing it monthly helps your dishwasher work better and keeps dishes cleaner.
Wash boards promptly after use and let them dry fully before storing. For deeper cleaning, warm water and gentle soap are usually enough for daily use.
These surfaces get touched constantly, so light maintenance matters.
Grease and fingerprints build up faster than you think. A quick weekly wipe keeps cabinets looking fresh and prevents sticky residue from becoming stubborn.
Splashes travel upward. Including the backsplash in your counter routine keeps grime from creeping into grout lines over time.
After washing dishes, give the sink a quick rinse and wipe. This prevents water spots, soap buildup, and lingering odors from forming.
Mineral deposits are easier to remove when they’re fresh. A quick wipe after heavy use keeps faucets clean without needing stronger cleaners later.
These areas anchor the whole kitchen.
Start at the farthest corner and work toward the exit. This keeps debris from spreading and ensures nothing gets missed under cabinets or along baseboards.
Crumbs love hiding under floor mats. Shaking them out weekly prevents buildup and keeps floors cleaner overall.
Even with liners, trash cans need cleaning. A quick rinse and wipe every couple of weeks helps control odors and keeps the area sanitary.
Most kitchen cleaning products are safe when used as directed, but problems tend to happen when things get mixed or used too aggressively. A few simple guardrails go a long way in keeping your cleaning routine effective and stress-free.
First, avoid mixing cleaning products unle
ss the label clearly says it’s safe. Some combinations create strong fumes or reactions that aren’t meant for indoor use. If you’re switching products on the same surface, rinse or wipe it down with plain water first.
Ventilation matters more than people think. Open a window, turn on the hood fan, or crack a door when cleaning the kitchen, especially when using sprays or degreasers. Fresh air keeps scents from lingering and makes the process more comfortable overall.
It’s also worth doing a quick patch test on delicate surfaces. If you’re using a cleaner for the first time on countertops, cabinet finishes, or appliance exteriors, test it in a small, hidden area first. This helps avoid discoloration or damage before it happens.
Finally, resist the urge to overdo it. More product doesn’t equal better cleaning. Using the right amount and giving it a little time to work is usually far more effective than scrubbing harder or layering cleaners.
Never mix bleach with vinegar, acids, or ammonia
Rinse surfaces between different cleaners
Use ventilation when cleaning enclosed spaces
Patch test on finished or delicate surfaces
Follow label directions, especially for dwell time
Cleaning should make your kitchen feel better, not turn into a chemistry experiment. Keeping it simple and intentional protects both your space and your peace of mind.

It’s not just about being sanitary; it’s about aesthetics, good impressions, and good habits, too.
A clean kitchen is a productive workspace, a nice area to hang out, and the best place to cook. Whether you’re planning to entertain or just want peace of mind after whipping up a casserole in your favorite Sauté Pan, a clean kitchen will provide the perfect end to any meal. Keeping a clean kitchen is the only option, really, and these tips make it that much easier.
Most kitchens benefit from a deeper clean about once a month. This is when it makes sense to tackle the oven, refrigerator shelves, hood filters, and cabinet fronts.
Daily resets and weekly wipe-downs handle most messes, but monthly deep cleans prevent buildup that’s harder to remove later and keep everything functioning better long-term.
The most efficient order is top to bottom. Start by clearing clutter and loading the dishwasher, then clean high-touch areas like handles and switches. Move on to appliances and counters, finish with the sink, and end with floors. This prevents you from re-dirtying surfaces and keeps cleaning time focused.
Cabinet handles, appliance buttons, light switches, and the inside rim of the sink are some of the most commonly missed areas. These spots collect oils and bacteria quickly because they’re touched often but rarely wiped during quick cleans. Adding them to a weekly routine makes a noticeable difference.
The key is small resets. Wiping counters after cooking, loading the dishwasher right away, doing a quick sink rinse, and sweeping high-traffic areas can all be done in under ten minutes. Daily habits reduce the need for long cleaning sessions later.
Sponges should be replaced or sanitized every one to two weeks, or sooner if they smell or break down. Kitchen towels and cloths should be washed at least once a week, and more often if they’re used for spills or raw food cleanup.
Sources:
Per and Polyfluoroalkyl Substances (PFAS) | FDA
Nonstick Cookware Safety Facts | Good Housekeeping
What Is the KonMari Method? | Good Housekeeping
The ‘forever chemicals’ fueling a public health crisis in drinking water | The Guardian .
Almost there! You're $90.00 away from free shipping
Get started with the Caraway essentials!
Free Shipping On Orders $90+
Free Returns
30-Day Trial